Assembly Instructions
Assembly Instructions for Easy Assembly:
You don’t have to be a qualified cabinetmaker to assemble our flat pack system. All cabinets are cut on CNC Machines so all the parts fit perfectly together, and all of our flat pack cabinets come complete with a set of detailed job specific assembly instructions – so assembly is easy. These instructions are included with your supplied flat pack (behind the attached Hardware Pick-List A4 page work), and specific to your job only (as they are based on your exact size cabinetry that you entered).
TIP: In conjunction to reading the information/tips below, we recommend that you watch the Assembly Instructions Video (available in the categories below) prior to assembly.
Click below for general Cabinet assembly instructions – Specific to Cabinet Type:
Base Cabinet
Base Drawer Cabinet
Base Corner Cabinet
Wall Oven & Microwave Tower
Wardrobe Internals
General Cabinet Assembly – Quick Overview:
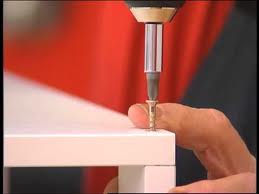
- Position the Cabinet Base and one Cabinet End together. The edge banded face will be facing down for both the cabinet parts. Ensure the parts are flush, and then simply screw together to secure.
- Position the other Cabinet End to the Cabinet Base, and again screw together to secure.
- Position the Cabinet Back (rear) panel on the top of the cabinet. Ensure the back is flush with the assembled Cabinet Ends and Cabinet Bottom, and then simply screw together to secure.
- Spin the cabinet over on to one of its Cabinet Ends, and position the front Cabinet Rail into place. Ensure the rail is flush with the Cabinet Ends, and (from the top) drill a 3mm pilot hole in through the Rail (to avoid the possibility of the Rail splitting when inserting the screws). Then simply screw together to secure.
- If there are any Fixed Shelves, place the cam fitting male end in to the sides and back. Place the fixed shelf over the top of this and knock in to place. Then simply tighten only the cam fitting until secure, by using a Phillips head screwdriver (not a battery drill).
- Tall and wall cabinets are assembled in the same manner, except there is no front cabinet rail, but a solid Cabinet Top.
- An average cabinet takes around 20 minutes to assemble, and a pantry in around 40. However, your first cabinets will take a little longer if you are new to this. All you need is a few common household tools (screwdriver, cordless drill, rubber mallet or hammer), and you will have the cabinets assembled in no time at all.
TIP: If you have ordered an accessory (e.g. bin system, etc), be sure to read the supplier’s assembly instructions before you assemble that particular cupboard. Note: Our cupboards are not pre-drilled for accessory products.
The tools that you would typically need for assembly are:
- Phillips head screwdriver – for door and drawer adjustments and for tightening Cam fittings
- Cordless drill – for general screw assembly
- Rubber mallet (or hammer)
- 10mm spanner – for connecting bench top toggle joints
Your order will contain:
- Job specific assembly instructions – please read these carefully before you begin assembly. Most of your questions should be answered in this.
- Cabinet carcasses – each part of each carcass will be individually labelled for easy cross-reference with the assembly instructions.
- Doors and/or drawer fronts.
- All screws and hardware (door hinges, drawer runners, etc) as required – unless you have specifically ordered from the carcass only option, in which case the hardware is not included, but the screws to assemble the cabinets are included.
- End panels (if ordered)
- Bench tops (if ordered)
- Kick boards ( if ordered)
- Headboard panels (if ordered)
- Handles (if ordered)
- Appliances (if ordered)
- Any accessories (if ordered) e.g. wire baskets, storage systems, etc
You will need to supply or purchase (additionally):
If you have ordered laminated bench tops, then some sanitary grade (neutral cure) Silicone & PVA wood glue – to be used in any benchtop joints.
Cabinet anchors/bolts to fit the cabinet to the wall – this will depend on the type of wall you are anchoring to (e.g. stud frame, brick, concrete, metal frame, etc).
Bench Top Joining:
When joining up a laminated bench top, ensure that you allow yourself enough uninterrupted time. You don’t need distractions when you start the process, as the glue starts setting pretty quickly. In saying that, provided you are prepared, then you will have no problems.
Explained here: Bench Top Joining
